1
1a
| 
2
1b
| 
3
1c
|

4
1d
| 
5
1e
| 
6
2
|

7
3
| 
8
4
| 
9
5
|
10
6
| 
11
7
| 
12
8
|

13
9
| 
14
10
| 
15
11
|
16
12
| 
17
13
| 
18
14
|

19
15
| 
20
16
| 
21
17
|
22
18
| 
23
19
| 
24
20
|
25
21
| 
26
22
| 
27
23
|

28
24
| 
29
28
| 
30
30
|

31
31
| 
32
32
| 
33
33
|

34
35
| 
35
38
| 
36
39
|

37
40
| 
38
41
| 
39
42
|

40
44
| 
41
46
| 
42
October 3, 2007
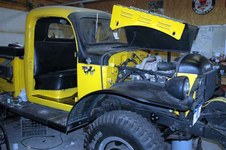
I am taking some time from finishing the Bandit to remove the 318, driveline and all Helitool equipment. Then actual start of the Cummins install will begin when the Bandit is complete
|

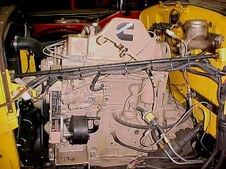
43
Oct-3,-2007
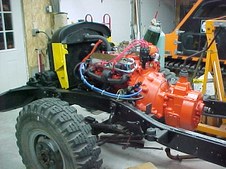
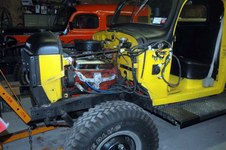
The 4BTA is a Cummins 2000 recon driving into a GM NV-4500
After a complete check of the 4BTA showing compression of 298,295,290 and 300 for the 4 holes and a crank end play of .008" plus great oil pressure both at idle and 1800 R's, I blessed the engine. She will outlive me. I had her steam cleaned today and then painted her.
By Mid Month ( October 2007) I will ave the 318 and complete driveline removed from the Bumblebee. Then as soon as the M37 Bandit is complete, the Bumblebee Cummins Swap starts.
| 
44
Oct-3,-2007a
| 
45
October-5,-2007a
|

46
October-5,-2007b
| 
47
Oct-19,-2007a
October 18, 2007
The 318, driveline and fuel tank all pulled. Now to complete the Bandit and then drop the Cummins in the Bumblebee.
| 
48
DSC 3578
February 17, 2008
Both 3rd Members converted to 4.89 ring and pinion and ARB Air Lockers added. Both are ready to go back in axle housings
|

49
Feb-19,-2008-b
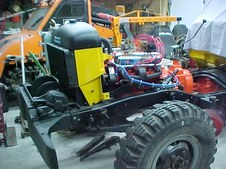
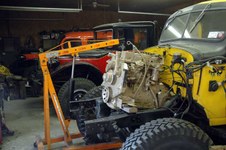
Establishing Engine/Transmission angle and Fabing Engine Mounts. I have decided to set the engine prior to doing the suspension. That way I can better tell what suspension changes are required with the weight of the 4BTA.
| 
50
Feb-19,-2008-a
| 
51
Feb-20,-2008
Front Engine Mounts complete.
|

52
Feb-21,-2008
Front Engine mounts installed. Now to change the rear main seal on the 4BTA, install the clutch, differential and a few other things and the engine can go in early next week.
| 
53
Feb-24-2008
Bumblebee gets her Oil Burner, a Cummins 4BTA.
| 
54
022608
February 26, 2008
The Cummins is in her 'final' resting place. Rest well....for now
LOL !
|

55
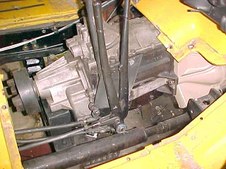
March-1-2008A
GM, NV-4500 installed
| 
56
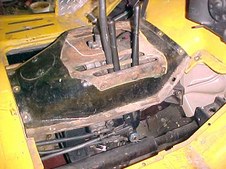
March-1-2008B
No Transmission Cover mods needed other than elongate the shifter hole by .750" towards the rear. Then the floor boards will drop right in place.
| 
57
March-1-2008C
More than enough room for the electric fan between the Cummins and radiator in Tractor mode. A few brackets and that can be put to bed.
|
58
032608a
| 
59
032608b
| 
60
032608c
|

61
032608d
| 
62
032608e
| 
63
March-28,-2008
It looks like the GM, NV-4500 will lend the needed clearances to run a PTO and Traditional Shaft Drive Winch.
|
64
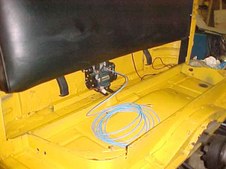
ARB-COMP
ARB Locker compressor gets mounted behind the seat. Thanks Dan for your work to bring us ARB Air Lockers ! Visit www.powerwagonlocker.com
for ARB Air Lockers for your Power Wagon, M-37 and WC's
| 
65
033008 1
ARB Lockers all installed. The Air Chuck for external air is mounted on the raiser of the drivers seat.
| 
66
040108
Time to rebuild the Turbo. The Turbo was near the max spec limits of radial and axial play. Now she will be as new. I am trying to address every area to avoid problems later on. Today was tear down, inspect, clean and paint.
Look at Album 'Turbo Rebuild' for pictorial of a complete rebuild.
|

67
040408
The Oil Burner could be lighted at any time. Add a drive shaft, fuel lines and she can now move on her own.
| 
68
April-20-2008
| 
69
April 28 2008a
WC Centered rear axle housing being installed.
|

70
April 28 2008 b
Centered rear in place. Now to clean up the disk brakes and paint and the Bumblebee will be back on her sneakers probably tomorrow, May 1st
| 
71
May-10-2008a
Hydroboost Installed, brakes juiced.
All thats really left is the new front springs which will be here on Monday 5/12, Intermediate Propeller Shaft and Seat Belts.
| 
72
May-10-2008b
The Aluminum Spacer between the MC and Hydroboost allows the Hydroboost to be clocked for best room and the MC to set level.
|

73
May-11-2008
Front suspension removed. UPS shows my new springs are in Syracuse, I will have them tomorrow.
Roll Out is getting close.
| 
74
May-15-2008a
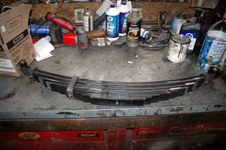
New Springs purchased from Steven Fowler. Three additional leafs were added by Kevin at Plattsburgh Spring to carry the weight of the Cummins. You can see placement of the new leafs ( they are the gray leafs) not yet painted
| 
75
May-15-2008
|

76
May-15-2008b
Back on the ground with a 2.750" lift.
| 
77
May-18-2008a
| 
78
May-18-2008b
|

79
May-18-2008c
| 
80
May-18-2008d
| 
81
May-18-2008e
|

82
May-18-2008f
| 
83
May-18-2008g
| 
84
May-18-2008h
|
85
May-18-2008j
| 
86
May-18-2008k
| 
87
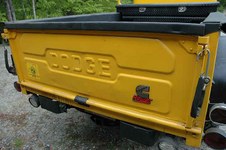
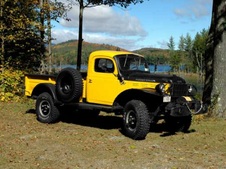
Bumblebee
|

88
BumbBee Calander
| |
